
Say Goodbye to Rising Damp: The Ultimate DIY Guide to Permanently Fix Your Walls
Rising damp is one of those silent issues that can slowly wreak havoc on your home—especially in older buildings or those with poor damp-proofing. If you’ve noticed peeling paint, musty smells, or damp patches creeping up your interior walls, there’s a good chance you’re dealing with rising damp. But don’t worry—you don’t have to break the bank hiring professionals. With the right tools and method, you can tackle this issue yourself and prevent further damage.
What Is Rising Damp?
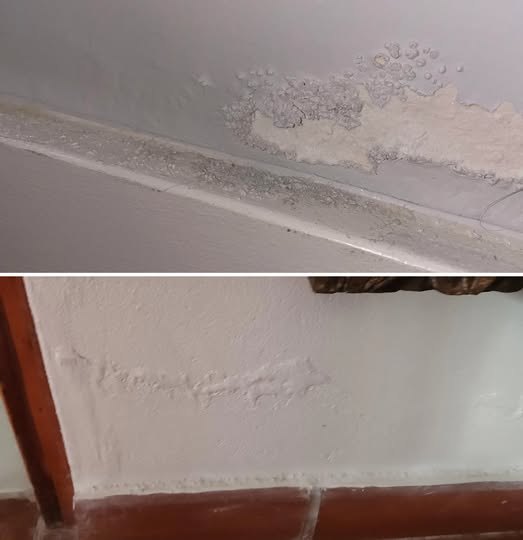
Rising damp occurs when groundwater moves vertically through a wall’s porous materials—like brick or concrete—via capillary action. It often shows up as tide-like marks, bubbling paint, salt deposits, or mold growth at the base of interior walls.
Left untreated, rising damp can lead to:
- Crumbling plaster
- Warped skirting boards
- Persistent mold and mildew
- A weakened wall structure
- Health issues from poor indoor air quality
Materials You’ll Need
Before starting, gather the following:
- Water-repellent mortar or anti-humidity mortar
- Spatula (or trowel)
- Wire brush or stiff cleaning brush
- Protective gloves
- Dust mask (especially if you’re removing paint or plaster)
- Paint or plaster with moisture-resistant properties (for finishing)
Step-by-Step DIY Method to Fix Rising Damp
Step 1: Clean the Wall Surface
- Scrape away any loose paint, plaster, or mold using a wire brush or spatula.
- Make sure the surface is as dry and clean as possible—this ensures the mortar adheres effectively.
- If mold is present, use a mold-killing solution and allow the wall to dry fully.
Step 2: Apply Water-Repellent Mortar
- Using your spatula, apply the anti-humidity mortar to the affected area.
- Spread it evenly and press it into any cracks or porous areas—this acts as a moisture barrier.
- For best results, apply at least two coats, allowing adequate drying time between layers.
Step 3: Refinish the Wall
- Once the mortar has cured completely, you can repaint or re-plaster the area.
- Be sure to use moisture-resistant materials to avoid future damp problems.
- Allow ventilation and drying time before sealing with paint or other finishes.
Additional Tips to Prevent Rising Damp
Preventing dampness is just as important as treating it. Here are some proactive steps you can take:
1. Improve Drainage Around the Foundation
Make sure the ground slopes away from your home to divert rainwater. Install or adjust French drains or gravel beds if needed.
2. Maintain Gutters and Downspouts
Clogged gutters can cause water to overflow and seep into the foundation. Clean them regularly and check that water drains away properly.
3. Install or Upgrade Your Damp-Proof Course (DPC)
A DPC is a moisture barrier inserted near the base of your walls. Many older homes lack one, or it may have deteriorated. Consider installing or repairing it if your problem persists.
4. Use Dehumidifiers in Trouble Areas
Rooms like basements or bathrooms often stay damp. A dehumidifier can reduce moisture levels, improving air quality and preventing new damage.
When to Call a Professional
DIY methods are effective for mild to moderate cases of rising damp. However, if you notice:
- Widespread mold
- Structural wall damage
- Persistent damp patches despite treatment
- Strong odors that don’t go away
…it may be time to consult a qualified damp-proofing specialist. They can perform a full inspection and recommend long-term solutions like chemical injections, DPC installation, or major repairs.
Final Thoughts
Rising damp can seem daunting, but with the right approach, it’s manageable—even fixable—on your own. Acting quickly and using the proper materials will stop moisture in its tracks and protect your walls from further damage.
Take the time to inspect your home regularly, especially in the colder, wetter months. A little maintenance now can save you from major renovations down the line.
By following this DIY guide, you’re not only preserving your home—you’re creating a healthier, safer environment for everyone inside.

Comments are closed, but trackbacks and pingbacks are open.